With pickleball booming across the world, more and more enthusiasts are exploring how to build a pickleball court in their own spaces. Whether it’s a backyard project or a full-sized court at a community centre, creating your pickleball setup has never been more popular.
Learning how to build a pickleball court is exciting, surprisingly affordable, and space-efficient. Unlike other sports, pickleball requires a smaller playing area, and with a little planning, you can repurpose existing spaces like tennis courts or even grassy patches to get started.
In this complete guide on how to build a pickleball court, you’ll discover cost breakdowns, space requirements, DIY options, and expert tips. Whether you’re going for a simple layout or a professional concrete court, you’ll be ready to build a court that fits your budget and needs perfectly.

🏗️ How to Build a Concrete Pickleball Court
If you’re looking for the ultimate pickleball setup, building a concrete pickleball court is the gold standard. Though it requires a bigger upfront investment, you’ll enjoy a professional-grade court with excellent durability, minimal maintenance, and top-notch playability for years. Here’s how to make it happen:
🧱 Step 1: Site Preparation and Groundwork
Before you even think about pouring concrete, you need a solid foundation.
- Clear the space: Remove grass, shrubs, rocks, or any debris to get down to bare earth.
- Level the surface: Uneven ground leads to drainage issues and cracks later. Bring in a contractor or use laser levels to make sure the area is perfectly flat.
- Create a sub-base: Add a 4–6 inch layer of crushed stone or gravel. This helps with drainage and ensures the concrete slab won’t shift or crack over time.
⏳ Time Required: 1–2 days
🛠️ Step 2: Pouring the Concrete Slab
This is where your court starts to take shape.
- Use reinforced concrete, at least 4 inches thick, with steel rebar or mesh to boost strength.
- Ensure proper drainage: The slab should have a 1% slope to allow rainwater to run off easily. Puddles are the enemy of pickleball!
- Cure time matters: Once poured, the slab needs a full 28 days to cure. Rushing this step can ruin the surface.
- ✅ Pro Tip: Install expansion joints to allow for temperature changes and prevent cracking.
⏳ Time Required: 1–2 days for the pour + 28 days curing
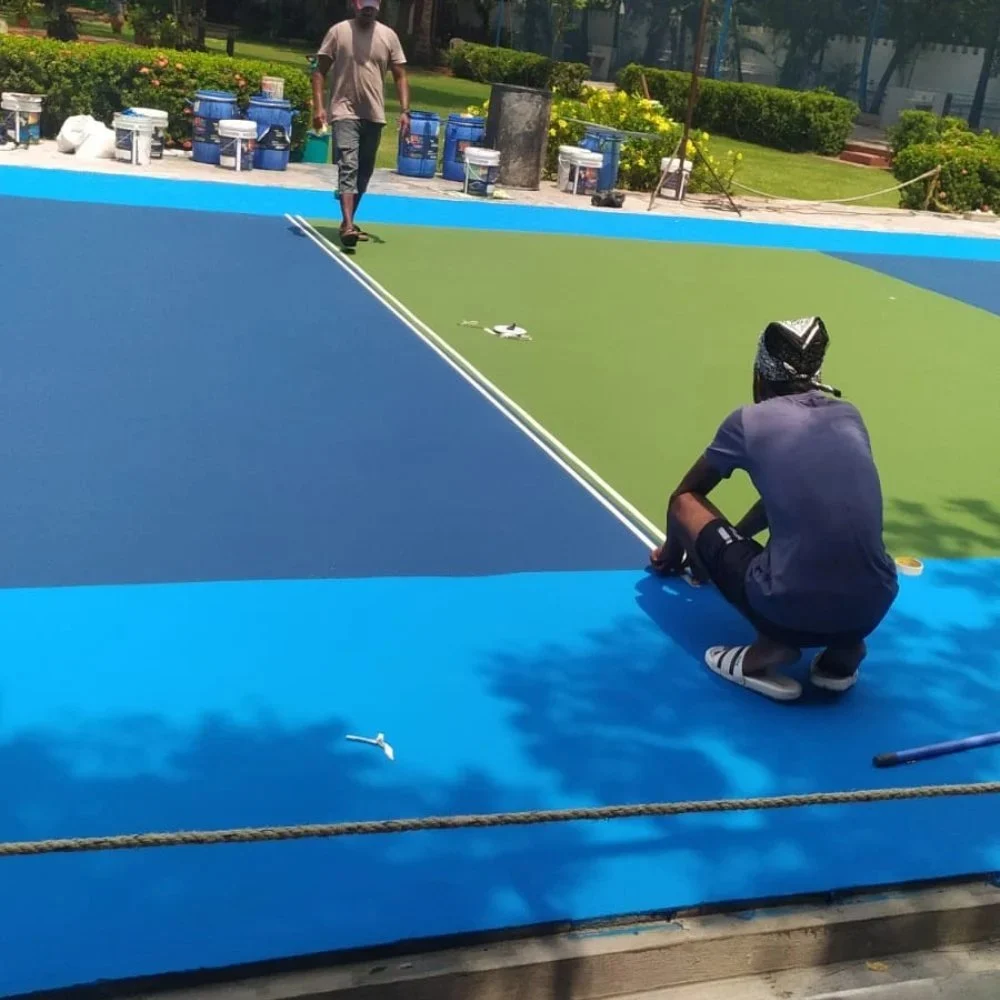
🎨 Step 3: Surface Coating & Court Painting
Now it’s time to turn a plain slab into a stunning court.
- Apply an acrylic surface system (the same used on tennis courts) for a grippy, weather-resistant finish.
- Add 2–3 coats with non-slip texture for safe, high-performance play.
- Paint the lines using official pickleball dimensions: 20×44 feet, with the non-volley zone (“kitchen”) clearly marked.
⏳ Time Required: 2–3 days
Step 4: Net Installation and Final Touches
The finishing touches will transform your court into a true pickleball paradise.
- Install the net system: Whether you choose a portable setup or permanent posts, make sure the net is centred and tensioned correctly.
- Consider upgrades: Adding perimeter fencing prevents you from chasing balls into the neighbor’s yard, and lighting allows for evening games.
- Bonus: A practice wall on one side lets you work on solo drills without a partner.
💡 Bonus Tips
- Lighting: Install LED floodlights for evening matches.
- Fencing: Chain-link or mesh fencing keeps balls on the court and improves safety.
- Practice wall: Great for sharpening your reflexes when partners aren’t available.

🏗️ How Much Does It Cost to Build a Pickleball Court?
When planning how to build a pickleball court, understanding the cost breakdown is crucial. Below is a detailed look at major cost factors, ranked from budget-friendly to premium, followed by backyard-specific savings tips and a timeline for each construction phase.
💰 Cost Breakdown by Quality Tier
| Tier | Site Prep & Base | Surface Material | Accessories & Finish | Estimated Total (USD / ₹) |
| Budget | Minimal grading; use existing asphalt or concrete slab | Paint lines on asphalt; or modular tiles ($3–4/sq ft; ₹255–₹340/sq ft) | Basic portable net ($50; ₹4,250) | $4,000–7,000 / ₹3.4–6 lakh |
| Standard | Grading + compacted gravel/asphalt base | Asphalt with acrylic coating ($4–6/sq ft; ₹340–₹510/sq ft) | Standard net system (~$400–600; ₹34,000–₹51,000), 4-ft fencing | $8,000–15,000 / ₹6.8–12.7 lakh |
| Premium | Full excavation, engineered base + drainage | Concrete slab with acrylic or cushioned finish ($6–8/sq ft; ₹510–₹680/sq ft) | Commercial net (~$1,000; ₹85,000), 10-ft fence, LED lights, windscreens, seating | $20,000–35,000 / ₹17–30 lakh |
⏱️ How Long Does It Take to Build a Pickleball Court?
Wondering how long does it take to build a pickleball court from start to finish? While timelines vary depending on materials, weather, and contractors, here’s a practical step-by-step schedule to guide your expectations:
| Phase | What Happens | Estimated Time |
| Planning & Permits | Site survey, getting permits, picking materials | 1–2 weeks |
| Site Preparation | Clearing ground, grading, compacting the base | 2–4 days |
| Base Installation | Laying gravel or sand, preparing drainage | 2–3 days |
| Surface Installation | Pouring concrete or installing tiles/asphalt | 3–7 days |
| Coating & Striping | Applying acrylic coatings, adding colour and game lines | 1–2 days |
| Accessories Setup | Installing net posts, fencing, lighting, optional seating | 1–3 days |
| Cure & Inspection | Letting surface cure, final safety check, and adjustments | Concrete: 7–10 days; Asphalt/Tiles: ready in 24–48 hrs |
✅ Pro Tip: Asphalt and modular tile courts can be ready to play in just a couple of days, while concrete courts need at least 7–10 days of curing for best durability.
💸 Cheapest Way to Build a Pickleball Court
If you’re curious how to build a pickleball court without overspending, you’re in good company! With pickleball’s booming popularity, many people want to create affordable courts at home. Here’s how you can keep costs low and still enjoy a great playing space.
✅ Use an Existing Surface
- Tennis or basketball court conversion: Instead of starting from scratch, make a pickleball court on a tennis court by adding temporary pickleball lines and using a portable net. This is one of the cheapest and quickest ways to get started.
- Grass or driveway setups: If you’re wondering, can you build a pickleball court on grass? Yes, you can! Mow and level the area, then use a roll-out sports surface or outdoor court tiles. It may not last as long as a permanent court, but it’s perfect for casual games.
🛠️ Go DIY with Materials
- Lines: Chalk, painter’s tape, or outdoor marking tape work well for temporary boundaries.
- Net: A portable pickleball net is affordable and easy to set up.
- Surface: Consider interlocking tiles instead of concrete or asphalt for a budget-friendly base.
- Fencing: If you have a backyard fence, skip extra fencing or use temporary netting.
🕒 Time and Cost-Saving Tips
- Minimal base prep saves you money on grading or levelling.
- DIY labour keeps costs down compared to hiring contractors.
- Repurpose old materials like patio pavers, nets, or fencing.
- Upgrade in stages — start with essentials, then add lights or seating later.
💡 Bonus Tips to Save Even More
✅ Check local classifieds for second-hand nets and gear.
✅ Ask neighbours if they want to chip in for a shared court.
✅ Look for discounts at sports or hardware stores during off-season sales.
By following these tips, you’ll know how to build a pickleball court that’s affordable, practical, and ready for action, without compromising on fun.
🏡 How to Build a Pickleball Court in Your Backyard
Dreaming of how to build a pickleball court right in your backyard? You’re not alone — backyard pickleball courts have become the ultimate home upgrade, bringing fun, fitness, and social time just steps from your door. Here’s how you can make it happen, and do it smartly.
✅ First, Check If You Have Enough Space
The first step is to assess how much space you need to build a pickleball court. A full-size court needs 20 feet by 44 feet of playing area, but ideally, you want around 30 feet by 60 feet when you account for the overrun zones.
👉 Wondering how small can you make a pickleball court? If space is tight, you can go as compact as about 26 feet by 52 feet, though you should be ready for a slightly tighter playing experience.
✅ Use What You Already Have to Lower Costs
One of the smartest ways to cut costs is to make use of existing infrastructure in your yard. You can convert a flat concrete or asphalt surface like a driveway or patio, into a court.
You can paint lines over existing pavement and use fences or poles that are already in place to hold up your net system.
These simple adjustments can dramatically reduce how much it costs to build a pickleball court in your backyard and help you stay within budget.
✅ Choose the Right Surface for Your Needs
When it comes to choosing a surface, you’ve got options:
- Concrete or asphalt is the most durable and consistent.
- Grass or artificial turf is affordable but requires more upkeep.
- Modular sport tiles are cushioned, easy to install, and great for DIY projects.
👉 What is the best surface for a pickleball court? For most people, a concrete base with an acrylic surface coating offers the best mix of performance and durability.
✅ Set Up the Lines and Net for Game Time
Once your surface is ready, it’s time to mark the court. You can use outdoor court tape for a quick DIY job or have the lines professionally painted with acrylic paint for a polished look. Add a portable or permanent pickleball net, and you’re all set to play.
✅ Add personal touches
Throw in a ball holder, some basic fencing, or DIY wind screens if you want to upgrade your court.
✅ Understand What Drives Backyard Costs
The average cost to build a pickleball court in your backyard typically ranges from $4,000 to $7,000, depending on your choices. Key cost factors include:
- The surface you choose, concrete, will cost more, while grass or turf is more affordable.
- How much site prep is needed? sloped yards may require extra grading or levelling.
- Lighting – adding solar lights can save money over hardwired systems.
- Fencing using an existing fence can help you cut down on expenses.
By following these clear steps, you’ll know exactly how to build a pickleball court in your backyard that’s affordable, fun, and ready for action.
💥 Pro DIY Tips:
- Recycle materials like old tennis nets or boundary cones.
- Use solar lights for evening play.
- Keep a maintenance kit handy (chalk, extra tape, broom) for touch-ups.
How to Make a Pickleball Court on a Tennis Court
Repurposing a tennis court is one of the smartest ways to build a pickleball court without starting from scratch. Here’s how to do it:
✅ Assess the tennis court condition
Make sure the surface is in good shape — free of cracks and with a level foundation. A worn-out court may need resurfacing before converting it.
✅ Measure and mark the pickleball court lines
A standard pickleball court is 20×44 feet. Use painter’s tape or temporary court line tape to mark the dimensions over one side of the tennis court. You can fit up to four pickleball courts on a single tennis court!
✅ Adjust the net height
Tennis nets are slightly higher than pickleball nets. Lower the tennis net centre to 34 inches, or use a portable pickleball net for the most authentic experience.
✅ Choose the best surface solution
A hard surface like asphalt or concrete is ideal. If your tennis court is already surfaced with these, you’re good to go.
✅ Check local guidelines
Always check if you need permission to mark or modify the tennis court, especially in public or shared spaces.
Bonus Tip
⭐ Use contrasting colours for pickleball lines so they don’t blend with tennis lines.
⭐ Consider installing portable nets if you want to keep the tennis function intact.
⭐ Invest in temporary or removable line kits if you’re using a public court.
Still thinking how pickleball is different from tennis, check out this guide
What Is Pickleball? The Thrilling Game Sweeping Across India
How to Make a Pickleball Court on Grass
Building a pickleball court on grass is a fun and budget-friendly way to get into the game, no heavy construction needed!
✅ Choose a flat patch of lawn
Pick the flattest, most even part of your yard. Slight slopes can throw off ball bounce and movement.
✅ Measure and outline the court
Mark out the standard 20×44 ft court using chalk, spray paint, or temporary court tape. A simple tape measure or pre-marked rope can help keep lines straight.
✅ Set up a portable net
Use a freestanding net system that doesn’t need to be anchored into the ground. Check that it’s regulation height: 36 inches at the sides, 34 inches in the middle.
✅ Prepare the grass surface
Mow the grass short and pack down soft spots for smoother play. While grass isn’t the ideal surface, it works fine for casual games.
✅ Allow for movement space
A standard pickleball court is 20 feet wide and 44 feet long, but that’s just the playing area. To play comfortably and safely, you need a total space of about 30 feet wide by 60 feet long. This extra room gives players space to move, chase shots, and avoid obstacles near the boundaries. On a grass setup, clear at least 5–10 feet of buffer zone around the court, especially behind the baselines, to keep the game safe and fun.
Bonus Tips to Upgrade Your Grass Court:
⭐ Use outdoor balls, designed for unpredictable surfaces.
⭐ Anchor your net with sandbags in breezy conditions.
⭐ For a premium touch, add a turf panel or interlocking mat over the grass.

Some truly interesting information, well written and loosely user genial.